
Introduction
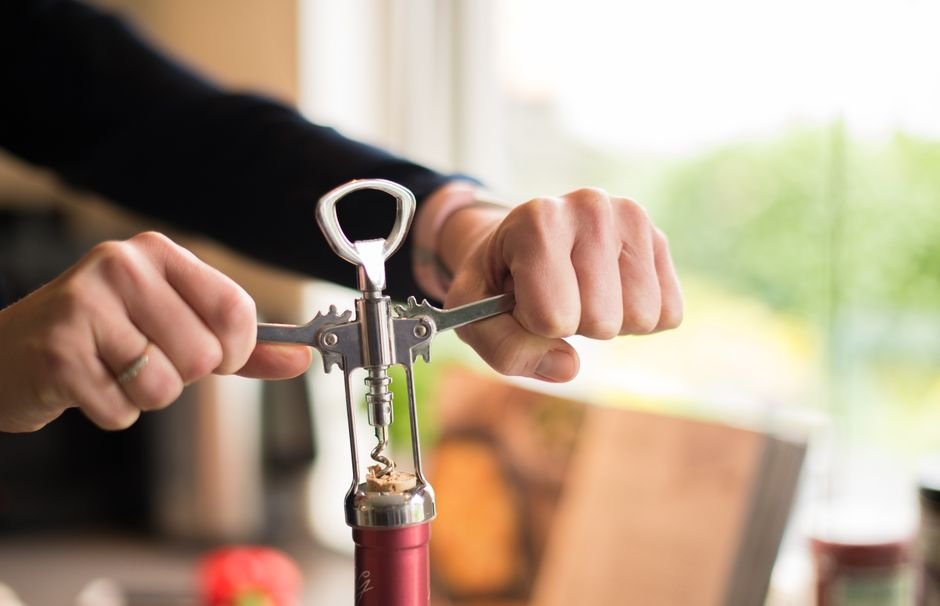
Imagine this: you’ve settled in for a relaxing evening, a delicious meal is cooking, and you reach for that perfect bottle of wine, only to discover your corkscrew is nowhere to be found. Panic sets in. Do you abandon your wine dreams? Absolutely not! This comprehensive guide will walk you through several ingenious and surprisingly effective methods on how to open wine without a corkscrew, using common household items. Whether you’re at home, on a picnic, or simply caught unprepared, these techniques will help you enjoy your wine without a hitch.

Opening a wine bottle without its designated tool might seem like a daunting task, but with a little patience and the right approach, it’s entirely achievable. We’ll explore methods that involve pushing the cork in, twisting it out with makeshift tools, and even some more unconventional, yet effective, approaches. Before attempting any of these, remember that safety is paramount. Always exercise caution and be mindful of your surroundings and the tools you are using. Let’s uncork the possibilities!
Key Points
The Shoe Method (Wall Method)
This is perhaps one of the most famous and widely shared methods for opening a wine bottle without a corkscrew. It relies on physics and a bit of gentle force.
- Prepare Your Bottle: First, ensure the foil or capsule covering the cork is completely removed. You can use a knife or even your fingernail for this.
- Find a Sturdy Shoe: A shoe with a good sole, like a sneaker or a boot, works best. Avoid delicate shoes or those with very thin soles.
- Place the Bottle in the Shoe: Lie the wine bottle on its side. Place the base of the bottle into the heel area of the shoe, ensuring it’s snug and secure. The shoe acts as a cushion and absorbs impact.
- Find a Solid Wall: Locate a sturdy, solid wall. Avoid plasterboard or anything that might be damaged by repeated impacts.
- Gently Tap Against the Wall: Hold the bottle securely in the shoe with one hand. With the other hand, gently but firmly tap the sole of the shoe (and thus the base of the bottle) against the wall. The impact creates hydraulic pressure inside the bottle, gradually pushing the cork out.
- Monitor the Cork: Keep an eye on the cork. It will slowly start to emerge. Don’t hit too hard; gentle, consistent taps are more effective.
- Remove the Cork: Once the cork has emerged about halfway, you should be able to grasp it and pull it out with your hand, or twist it out. If it’s still too tight, continue tapping until it’s loose enough.
Pros: No special tools needed beyond a shoe and a wall. Generally safe if done correctly. Preserves the cork’s integrity.
Cons: Requires a bit of effort and can be messy if the cork comes out too quickly and wine spills. Risk of breaking the bottle if hit too hard.
The Screw and Pliers Method
If you have a toolbox handy, this method is surprisingly effective and mimics the action of a corkscrew quite closely.
- Gather Your Tools: You will need a long screw (preferably a wood screw with a good thread), a screwdriver, and a pair of pliers (or a hammer with a claw).
- Insert the Screw: Carefully screw the screw into the center of the cork. Leave about an inch or so of the screw exposed. The screw should be long enough to penetrate deep into the cork without going all the way through to the wine.
- Grab with Pliers/Hammer: Once the screw is firmly embedded, use the pliers to grip the head of the screw tightly. If using a hammer, wedge the claw under the head of the screw.
- Pull the Cork Out: With a steady and firm motion, pull the screw upwards, leveraging the pliers or hammer. The cork should come out with the screw.
Pros: Very effective and controlled. Less likely to push the cork into the bottle.
Cons: Requires specific tools (screw, screwdriver, pliers/hammer). Can be difficult if the screw doesn’t get a good grip.
The Key Method
This method uses a common household item – your car or house key – to slowly work the cork out. It requires patience and a gentle touch.
- Insert the Key: Take a sturdy key and carefully insert it into the cork at an angle, around the edge. Push it down as far as you can without breaking the key.
- Twist and Lever: Once the key is in, twist it slightly and then gently lever it upwards, working your way around the cork. Think of it like slowly wiggling the cork out.
- Repeat: Continue this process, inserting the key, twisting, and leveraging, moving around the circumference of the cork. Gradually, the cork will start to rise.
- Pull Out: Once enough of the cork is exposed, you can try to grasp it and pull it out by hand, or continue leveraging with the key until it’s fully dislodged.
Pros: Uses a readily available item. No strong impact needed.
Cons: Requires significant patience and dexterity. Can damage the cork, causing it to crumble. Risk of breaking the key.
The Wire Hanger Method
A metal wire hanger can be repurposed into a makeshift cork remover with a bit of bending.
- Straighten and Bend: Take a standard metal wire hanger and straighten it out as much as possible. Then, create a small, sharp hook at one end.
- Insert the Hook: Carefully push the straightened end of the hanger down the side of the cork, between the cork and the glass. Try to get it as deep as possible.
- Hook the Cork: Once the hook is past the bottom of the cork, rotate the hanger so the hook catches the underside of the cork.
- Pull Up: Gently but firmly pull the hanger upwards, using the hook to pull the cork out. You might need to wiggle it a bit.
Pros: Uses a common item. Can be surprisingly effective.
Cons: Can be difficult to get the hook to catch properly. Risk of breaking the cork or bending the hanger. Requires some manual dexterity.
The Push-In Method (with a Blunt Object)
This method bypasses the need to extract the cork by simply pushing it into the bottle. While effective, it means the cork will be floating in your wine, which some people dislike.
- Find a Blunt Object: Look for a strong, blunt object that has a slightly smaller diameter than the cork. Good options include the end of a wooden spoon, a sturdy marker, or even the handle of a toothbrush (ensure it’s clean!).
- Prepare the Bottle: Remove any foil or capsule.
- Position the Object: Place the blunt end of your chosen object squarely on the center of the cork.
- Apply Pressure: With steady, firm pressure, push the cork downwards into the bottle. You may need to wiggle it a bit or apply a consistent force. You’ll feel a pop when the cork gives way and falls into the wine.
Pros: Relatively quick and simple. No risk of crumbling the cork externally.
Cons: The cork ends up in your wine. Can be difficult to pour without the cork getting in the way. Not ideal for long-term storage of the opened bottle.
The Bike Pump Method (Advanced)
This method uses air pressure to push the cork out. It’s quite effective but requires a bike pump with a needle attachment (for inflating sports balls) and some caution.
- Prepare the Bottle: Remove the foil.
- Insert the Needle: Carefully insert the needle of the bike pump into the center of the cork, pushing it all the way through until it’s just inside the bottle.
- Pump Air: Slowly and steadily pump air into the bottle. The increased air pressure inside the bottle will gradually push the cork upwards.
- Monitor and Remove: As the cork begins to emerge, stop pumping. Once it’s out far enough, you can pull it the rest of the way by hand.
Pros: Very effective and clean.
Cons: Requires a specific tool (bike pump with needle). Risk of the cork shooting out unexpectedly if too much pressure is applied too quickly. Can be dangerous if not done carefully.
Tips for Success and Safety
- Always Remove Foil: Regardless of the method, ensure all foil or capsule material is completely removed from the neck of the bottle.
- Protect Your Hands: When applying force or using sharp objects, consider wrapping your hands with a towel or wearing gloves to prevent injury.
- Stabilize the Bottle: Keep the bottle stable. If possible, place it on a non-slip surface or hold it firmly between your knees (with caution) when applying force.
- Be Patient: Rushing can lead to accidents or a broken cork. Take your time with each method.
- Mind Your Surroundings: Be aware of where the cork might fly if it pops out suddenly. Keep people and fragile objects out of the line of fire.
- Avoid Extreme Heat or Cold: Do not attempt to heat the neck of the bottle to expand the glass, as this can cause the bottle to shatter. Similarly, extreme cold can make the cork brittle.
- If the Cork Crumbles: If the cork crumbles and falls into the wine, you can strain the wine through a fine-mesh sieve or cheesecloth to remove the bits.
- Consider the Wine’s Value: For very expensive or aged wines, it might be worth waiting until you have a proper corkscrew to avoid damaging the wine or the bottle.
Remember that practice makes perfect, but hopefully, you won’t need too much practice with these emergency wine-opening techniques!
FAQs
Q1: Is it safe to push the cork into the bottle?
A: Yes, it is generally safe to push the cork into the bottle. The cork itself is inert and won’t contaminate the wine. The main downside is that it will float in the wine, which can make pouring a bit challenging, and some people find it aesthetically unpleasing. You might need to decant the wine or pour carefully to avoid bits of cork if it breaks apart.
Q2: Can I use a knife to open a wine bottle?
A: Using a knife to open a wine bottle is generally not recommended due to the high risk of injury. It’s very easy for the knife to slip, potentially causing serious cuts or breaking the bottle. If you must use a knife, only use it to carefully cut away the foil, never to pry or twist the cork itself. Safer alternatives are always preferred.
Q3: What if the cork breaks apart while I’m trying to open it?
A: If the cork breaks apart, don’t despair! You can still enjoy your wine. If large pieces remain, try to remove them with tweezers or a small, clean utensil. For smaller fragments, you can pour the wine through a fine-mesh strainer, a coffee filter, or a cheesecloth into another container or directly into glasses. This will filter out any unwanted cork bits.
Q4: Are there any methods that don’t involve tools at all?
A: The most common tool-free method is the shoe/wall method. While it uses a shoe, it’s an item almost always readily available. Other methods typically require at least a common household item like a screw, key, or hanger. Completely tool-free methods are very difficult and often involve risks of breaking the bottle or serious injury, so they are not recommended.
Q5: Will these methods damage the wine?
A: Most of these methods, if performed carefully, will not damage the wine itself. The primary risks are breaking the bottle, pushing the cork in (which isn’t damaging but can be inconvenient), or having cork bits fall into the wine. The wine’s quality will remain unaffected, though a very old or delicate wine might be more susceptible to sediment disturbance if the cork is pushed in aggressively.
Q6: How can I prevent needing these methods in the future?
A: The best way to prevent needing these emergency methods is to always have a reliable corkscrew on hand! Consider keeping a spare in your kitchen drawer, car, or picnic basket. Many multi-tools also include a corkscrew, making them a handy item to carry. For future reference, you might be interested in how to clean a harmonica properly, although that’s a different kind of tool entirely.
Conclusion
Running into a situation where you need to open a bottle of wine without a corkscrew can be frustrating, but as this guide demonstrates, it’s far from insurmountable. From the classic shoe method to the ingenious screw-and-pliers technique, there are multiple ways to get that cork out and enjoy your beverage. Each method has its own set of advantages and challenges, but with a bit of patience, careful execution, and adherence to safety guidelines, you can successfully uncork your bottle.
Remember to always prioritize safety, use common sense, and choose the method that best suits the tools you have available and your comfort level. While these tips are invaluable for emergencies, having a good quality corkscrew is always the most straightforward solution. So, the next time you’re faced with a corkscrew-less conundrum, refer to this guide, and you’ll be pouring a glass in no time. Cheers to resourcefulness!